
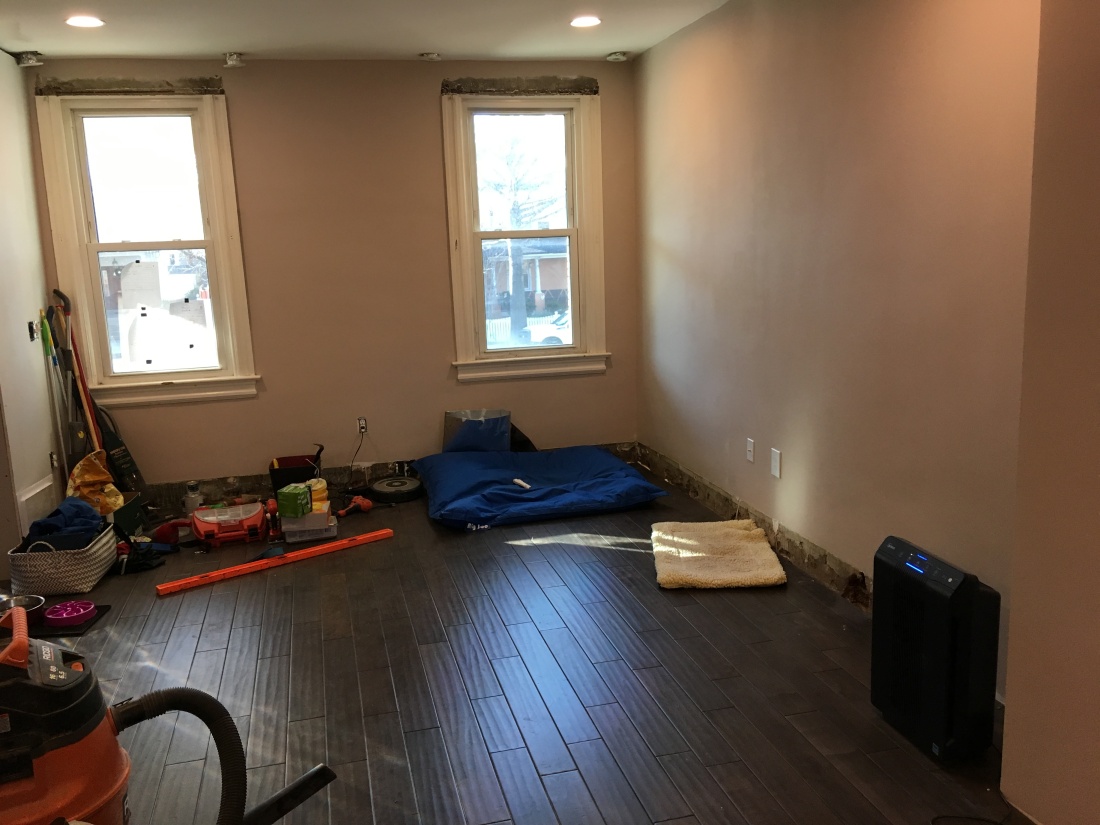
Our living room is SOOOOO close to being finished, which means we are DAYS away from putting furniture in the room and having a place to sit down!! I feel like a kid the night before Christmas…I’m so excited that I can almost feel those soft sofa cushions under my butt. You see, we have not had anywhere to sit since we purchased the house except for two hard kitchen chairs the previous owner left behind. When we moved in last month, we added three plastic folding chairs to sit at our island, but we still didn’t have anywhere to lounge or relax at the end of the day. We’ve been waiting to bring our living or dining room furniture into the house on a few outstanding, dust-producing tasks to get done.
But it’s a three-day weekend which means WE ARE GOING TO DO ALL THE THINGS!! Now that the plumber has replaced an old pipe we discovered in the front entryway wall and ceiling, we are going to close it up and paint it! Then we will install baseboard trim and re-finish the trim around our entryway door and two front windows.
Jeremy and I are already experts at installing baseboard trim because last weekend we installed a ton of it in our living and dining rooms. We only have a few pieces left to install after we finish the previously mentioned front wall.
How to Install Baseboard Trim
Difficulty level: Easy
Compared to some of the other tasks we’ve done, installing baseboard trim is pretty easy. We had to buy two power tools to get it done, but we think they’ll come in very handy when we tackle the basement renovation later this year.
Step 1: Measure wall
We bought extra long baseboards to ensure a single piece could reach from one side of the room to the other. We didn’t want any seams showing in the baseboard. I keep yelling “million dollar house!” and these details are how we’re gonna get there (I’m partially kidding). We measured each length of wall that would need a piece of baseboard and accounted for the 45-degree angle cut the saw would make. The goal was to make perfect, 90-degree corners at each inside or outside corner.

Step 2: Measure and cut the baseboard
We bought a 10-inch miter saw to cut wood at a 45-degree angle. Unfortunately the blade was not big enough to cut through our 7.5-inch tall baseboards…which we learned the hard way. The saw only cut through about 6 inches of the board and then we manually cut the rest with a tiny baby saw called a coping saw. I wouldn’t recommend this process but we didn’t have any alternative.
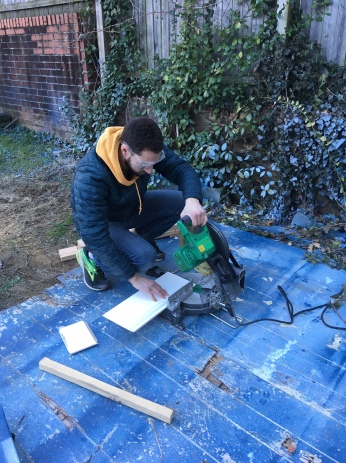
This step was confusing because we had measured the wall but didn’t know HOW to account for the 45-degree cut at the end. After a bunch of trial and error, we figured out where to cut the boards to create nice looking corners. Not all of our corners are perfect, but hopefully our friends and family won’t be crawling around looking for slight gaps at each corner. Plus, step # 4 mostly made up for this problem
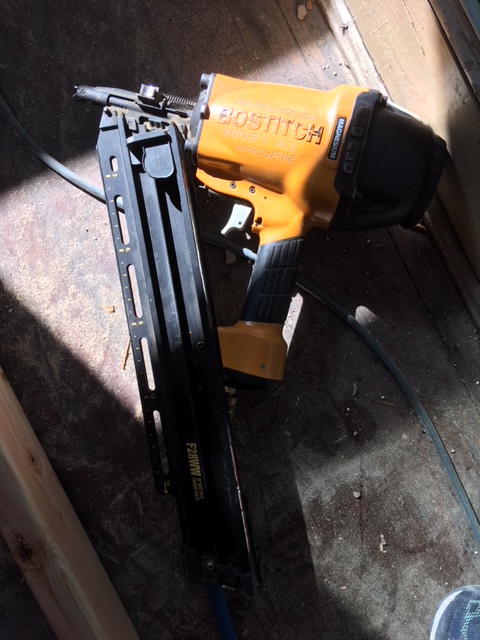
Step 3: Nail the suckers in
We bought an AWESOME new, light-weight nail gun for this project, instead of renting an old, big, heavy one from the hardware store. It is so much easier to use and got the job done so fast. We nailed the baseboards into studs located behind the wall. We were lucky there were studs integrated into the plaster/brick walls, otherwise we’d have to use liquid nails which is a fancy word for super sticky glue, which is a lot more stressful to work with. We used our feet to push the baseboard close to the wall, then nailed those suckers in!


Step 4: Caulk the seams and edges
To hide any gaps, Jeremy used his trusty caulk gun to caulk the seams and edges along the top and corners of the baseboards. At each corner, he applied caulk BEFORE nailing it in place, to achieve a fully sealed-looking corner. For those corners that did not achieve a perfect 90-degree angle, I applied wood filler in the gaps to manually create the look of a sharp corner.

Step 5: Put wood filler in nail holes and any dings, then sand
To make the baseboards look flawless, I crawled around filling all the nail holes and dings with wood filler. Baseboards are not made from solid wood–they’re super light weight so they’re easy to handle but they ding at the slightest touch! The wood filler dries very quickly, then I sanded it flat to create a smooth surface

Step 6: Paint, then paint again!
We applied two coats of super white paint in semi-gloss. and BAM, we suddenly have a livable space.
We’ve been sanding the trim around our two windows, and Jeremy is cobbling together a new set of window trim for a window in the back of the house from scraps we saved during demo. I’ll post more on that once it’s done. For now, keep your fingers crossed for a productive weekend that will end in me sitting on a couch!


")


