
When we started renovating our house last August, the basement was the last thing on our minds. We knew we wanted to eventually finish the basement and make it part of our living space, but it felt very unimportant in light of the massive undertaking the rest of the house required.

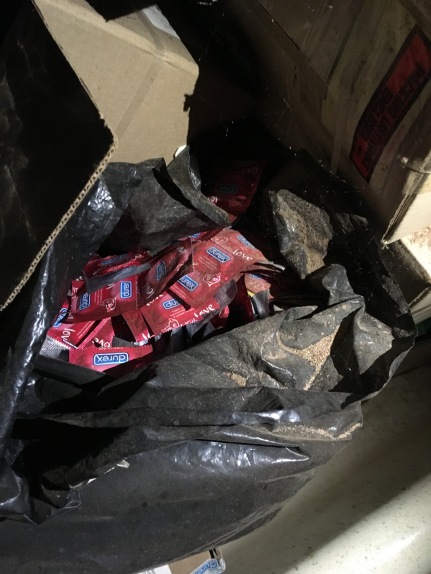
All this junk was waiting for us on day 1
In the first month of home-ownership, we needed to accomplish two things in the basement: remove the junk and get a new hot water heater. The previous owner left a lot of ‘stuff’ in the basement (including 8 mattresses and a bathtub full of expired and unused condoms), so a junk hauling company removed it all the day after we closed on the house.
We needed to replace the broken hot water heater in the first month of owning the house. At the time, we told the plumber to place the hot water heater in the same place as the old, one. THIS WAS OUR FIRST MISTAKE! We were overwhelmed by all the house-related decisions we were making in that first month and we didn’t think critically about the type or location of the hot water heater. In hindsight, we should have selected a tankless gas heater instead of the gigantic electric tank we went with, and we would have put it along the exterior wall instead of plop in the middle of the living space! At the time it felt like a huge feat just to get hot water working in the house so we patted ourselves on the back…and then we stopped thinking about the basement for many months.


Then…in January, a general contractor added plumbing for our two new bathrooms upstairs and connected it to the sewer line that’s accessible in our basement. They dug a huge hole in the floor, connected the pipe, and then covered the hole with cement. We started thinking a little be more about how we wanted to use the basement: where should the washer and dryer go? How big do we want the basement bathroom? When we removed the load bearing wall upstairs, we had to put two additional support columns in the basement which presented new challenges for the layout of the basement. We did some thinking and then continued to ignore this space while we finished the kitchen, the bonus room, and the master bathroom.
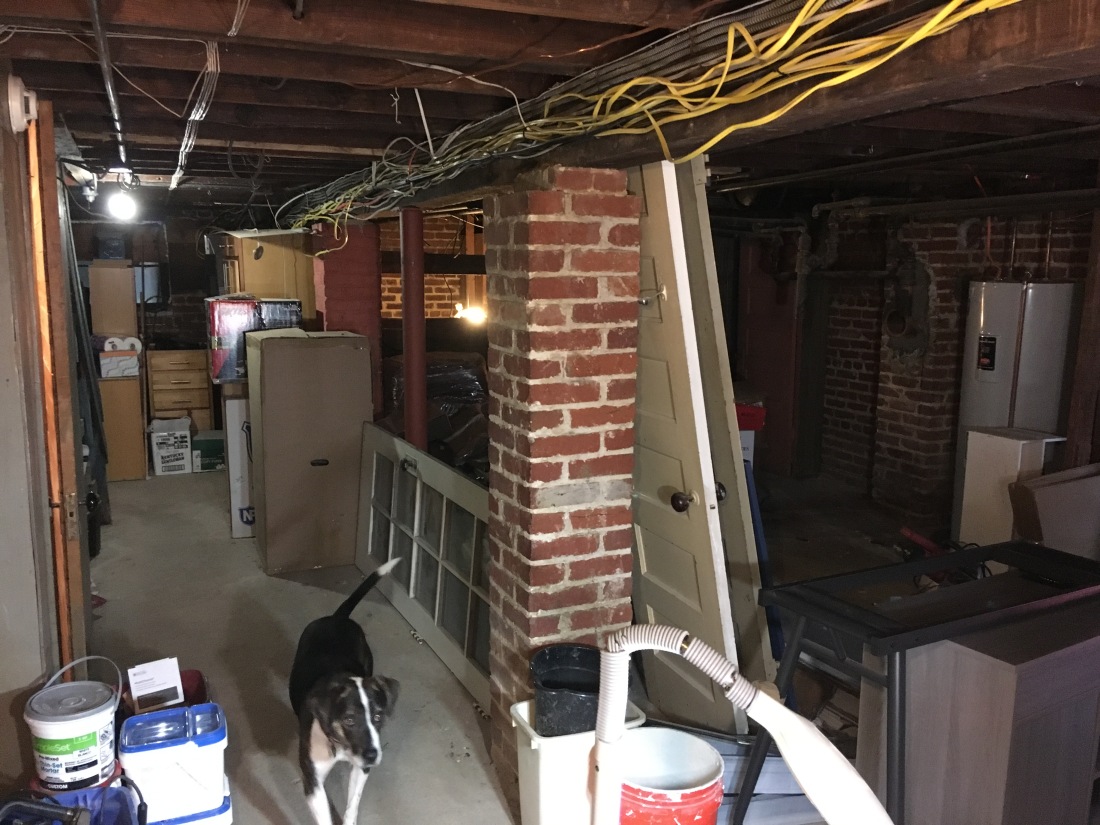
By the time summer rolled around, it was time to get serious about finishing the basement. It seemed like a huge undertaking since it’s about 600 square feet, including a staircase, the laundry, and a full bathroom. Before we could start making it look livable, we had to fix one huge glaring problem:

All the pipes and electric wires that feed up into the rest of the house were hanging below the ceiling joists. This prevented us from installing a ceiling in the basement because the pipes and wires ran across them. So Jeremy did something I didn’t think a homeowner could DIY: he moved all of the pipes and plumbing himself (except the gas line….for which we hired a plumber).
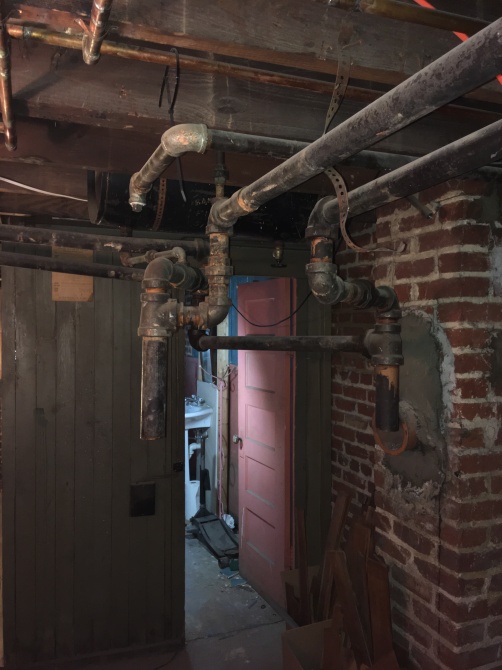
The old cast iron radiator pipes were hanging reaaaaal low
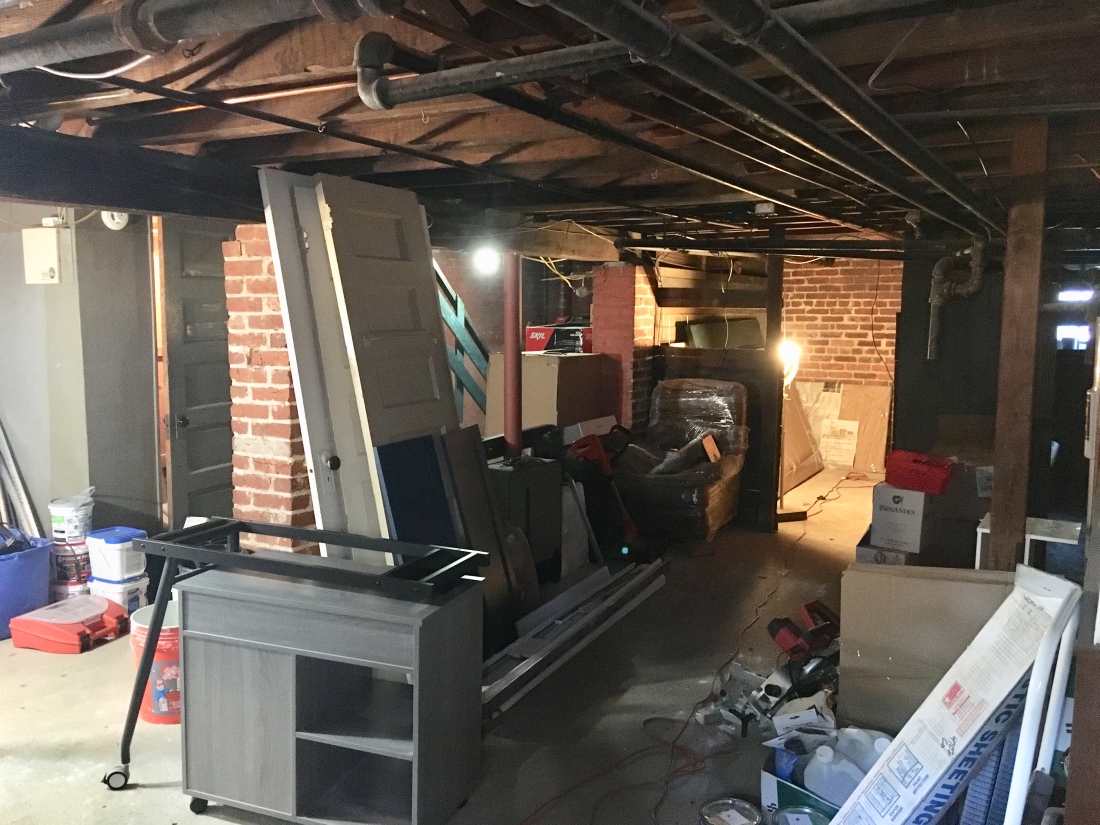
Jeremy diligently spent the better part of three weeks tinkering away in the basement while I provided emotional support. Well, I did help to remove the old cast iron boiler pipes, but that was it.
To remove the cast iron pipes from the now-defunct boiler system, we first tried to smash the elbows with a hammer and mallet, at the suggestion of our plumber. It was basically impossible, so then we used our reciprocating saw with a metal blade. It worked MUCH easier, but it was LOUD.


Then Jeremy cut the copper plumbing lines that were hanging below the joists and connected them to modern plumbing connections using the Shark Bite brand of plumbing materials. This man learned how to cut, move, and re-establish all the plumbing lines in our entire house by googling it and watching YouTube videos!


He was able to move all the plumbing up into the beam, and run it around the house along the beam in the basement. There was only one or two major hiccups when he forgot to glue two of the connectors together…which we discovered when we turned the water on and it sprayed all over the place. Ahhhh the joys of DIY remodeling.
After Jeremy moved all the plumbing around, we decided it was worth it to move the hot water heater from it’s unfortunate location in the middle of the living space to underneath the stairs. We emptied the hot water tank by hooking up a hose and sending the water outside to an outdoor drain. Then we cut the connection and literally swiveled and danced the hot water heater across the room until it was in place under the stairs. Jeremy hooked it back up to the water lines and voila–we had successfully hidden the hot water heater and reclaimed a large portion of the basement for ourselves!


In my next post, I’ll share how we framed out several walls in the basement and installed electric outlets and ceiling lights, and how we insulated the basement to protect from the cold and sounds from upstairs!

Hi there. For the pipe plumbing that you moved– were those steam radiator pipes or just normal plumbing? I am thinking about doing the same for steam piping.
LikeLike
They were for steam radiators. The boiler was broken so we decided to replace the entire system with a heatpump instead. Jeremy removed the radiator pipes and sold them to a scrap yard for a couple hundred bucks.
LikeLike
Nice! thank you! we are considering the same — replacing the steam with a heat pump. we are in the north east so itll have to operate at colder temps though, so we have to see if we can find one that operates at colder temperature ranges..
LikeLike
We are located in DC so our winters never get too cold down here. Good luck on your project!
LikeLike