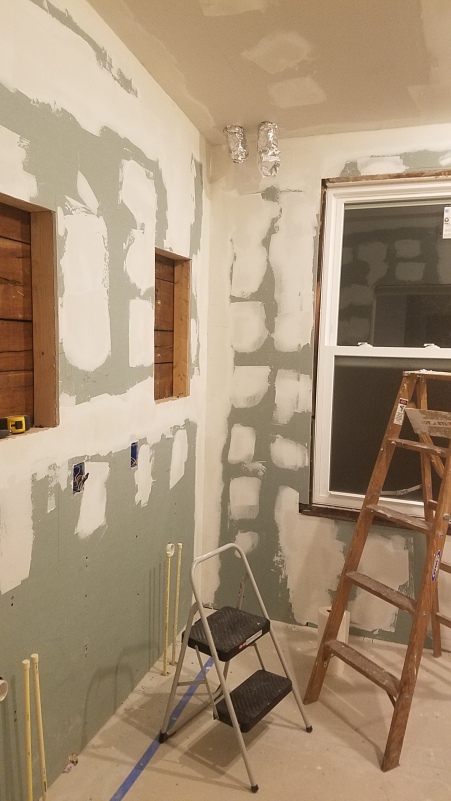
Before we left for our honeymoon, we spent a weekend putting up the walls in the master bathroom. Our friend Elizabeth came over and we worked like a well-oiled machine to cut and install the greenboard (it’s just like drywall but meant for bathrooms) all over the room. While not very technically difficult, the task is certainly physically grueling, and we were exhausted by the time we were finished! But we knew we’d come back from our wedding and honeymoon ready to FINISH THIS HOUSE!!
Wallboard installed and waiting for us to return from our honeymoon!
Just kidding, at times it feels like we will never finish the house…but at least we are motivated to finish our master suite! This month our plan is to complete our walk-in closet and move forward with the master bathroom.
The day we returned from Costa Rica, we hit the ground running. We went to an AMAZING interiors store called Floor and Decor in Alexandria, Virginia. HOLY COW HOW DID WE NOT KNOW ABOUT THIS STORE BEFORE NOW!??! I am actually legitimately mad that we purchased so many of our materials for the house elsewhere, because this store is MAGICAL. They have all types of flooring and tile materials at incredible prices. They are not paying me to say this, but I want to shout it from the rooftops!
Ok, back to our master suite…this week we needed to finalize our design choices for the bathroom and buy the tile. I’m sure you’ve been waiting with baited breath on our selection of tile for the master bathroom and we finally settled on….REAL MARBLE!! I didn’t want the master suite to be a clone of the hall bathroom but we truly love our other bathroom, so we decided to go with a similar look.
Floor and Decor has an obscene amount of marble tile sizes, shapes, and patterns to choose from. We settled on a combination of three different tiles to add some visual interest to our bathroom. It was so hard to make a final decision because it feels so FINAL (because that’s what it is), but after three hours and a lot of different combos, we bought about $2,000 worth of tiles (for a bathroom that’s 9′ x 10′). We had rented a tiny Honda Civic and it was riding loooooow to the ground on our way home from the store due to all the weight (did I mention how fun home renovations are without a car?).
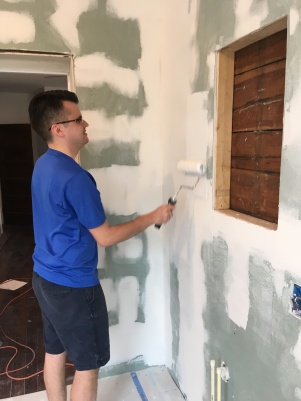
But before we can install the tile, we had to paint the entire room (le sigh). So this past weekend, we kicked it into overdrive to compound the seams in the walls, sand the walls flat, and paint the entire room. With the incredible help from our friend Alan, we applied three coats of compound on Saturday. To speed up the drying process between rounds of compounding, we cranked up the heat and turned on all the space heaters and dehumidifiers we could find.
After we applied compound to the walls
Then on Sunday, Jeremy single-handedly sanded all the bumpy compound to a flat and smooth surface and vacuumed the entire room. I sealed him into the room so no dust would enter the other rooms.
My hero after sanding the entire room!
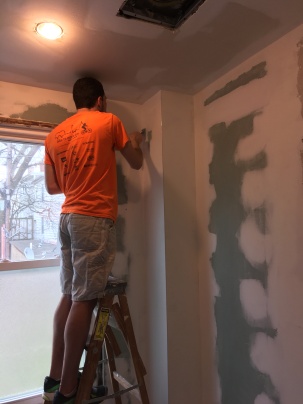
Then our very helpful friend Chris came over and we primed and painted the entire room!
Chris helping to prime and paint our bathroom!Priming is boring but necessary
We decided to paint the room the same color as the other bathroom, Sleigh Bells by Benjamin Moore. It’s basically a greige that leans heavily toward green/blue. It looks pretty underwhelming right now, but once we have our vanity and tiles and trim it’ll look AHMAZING.
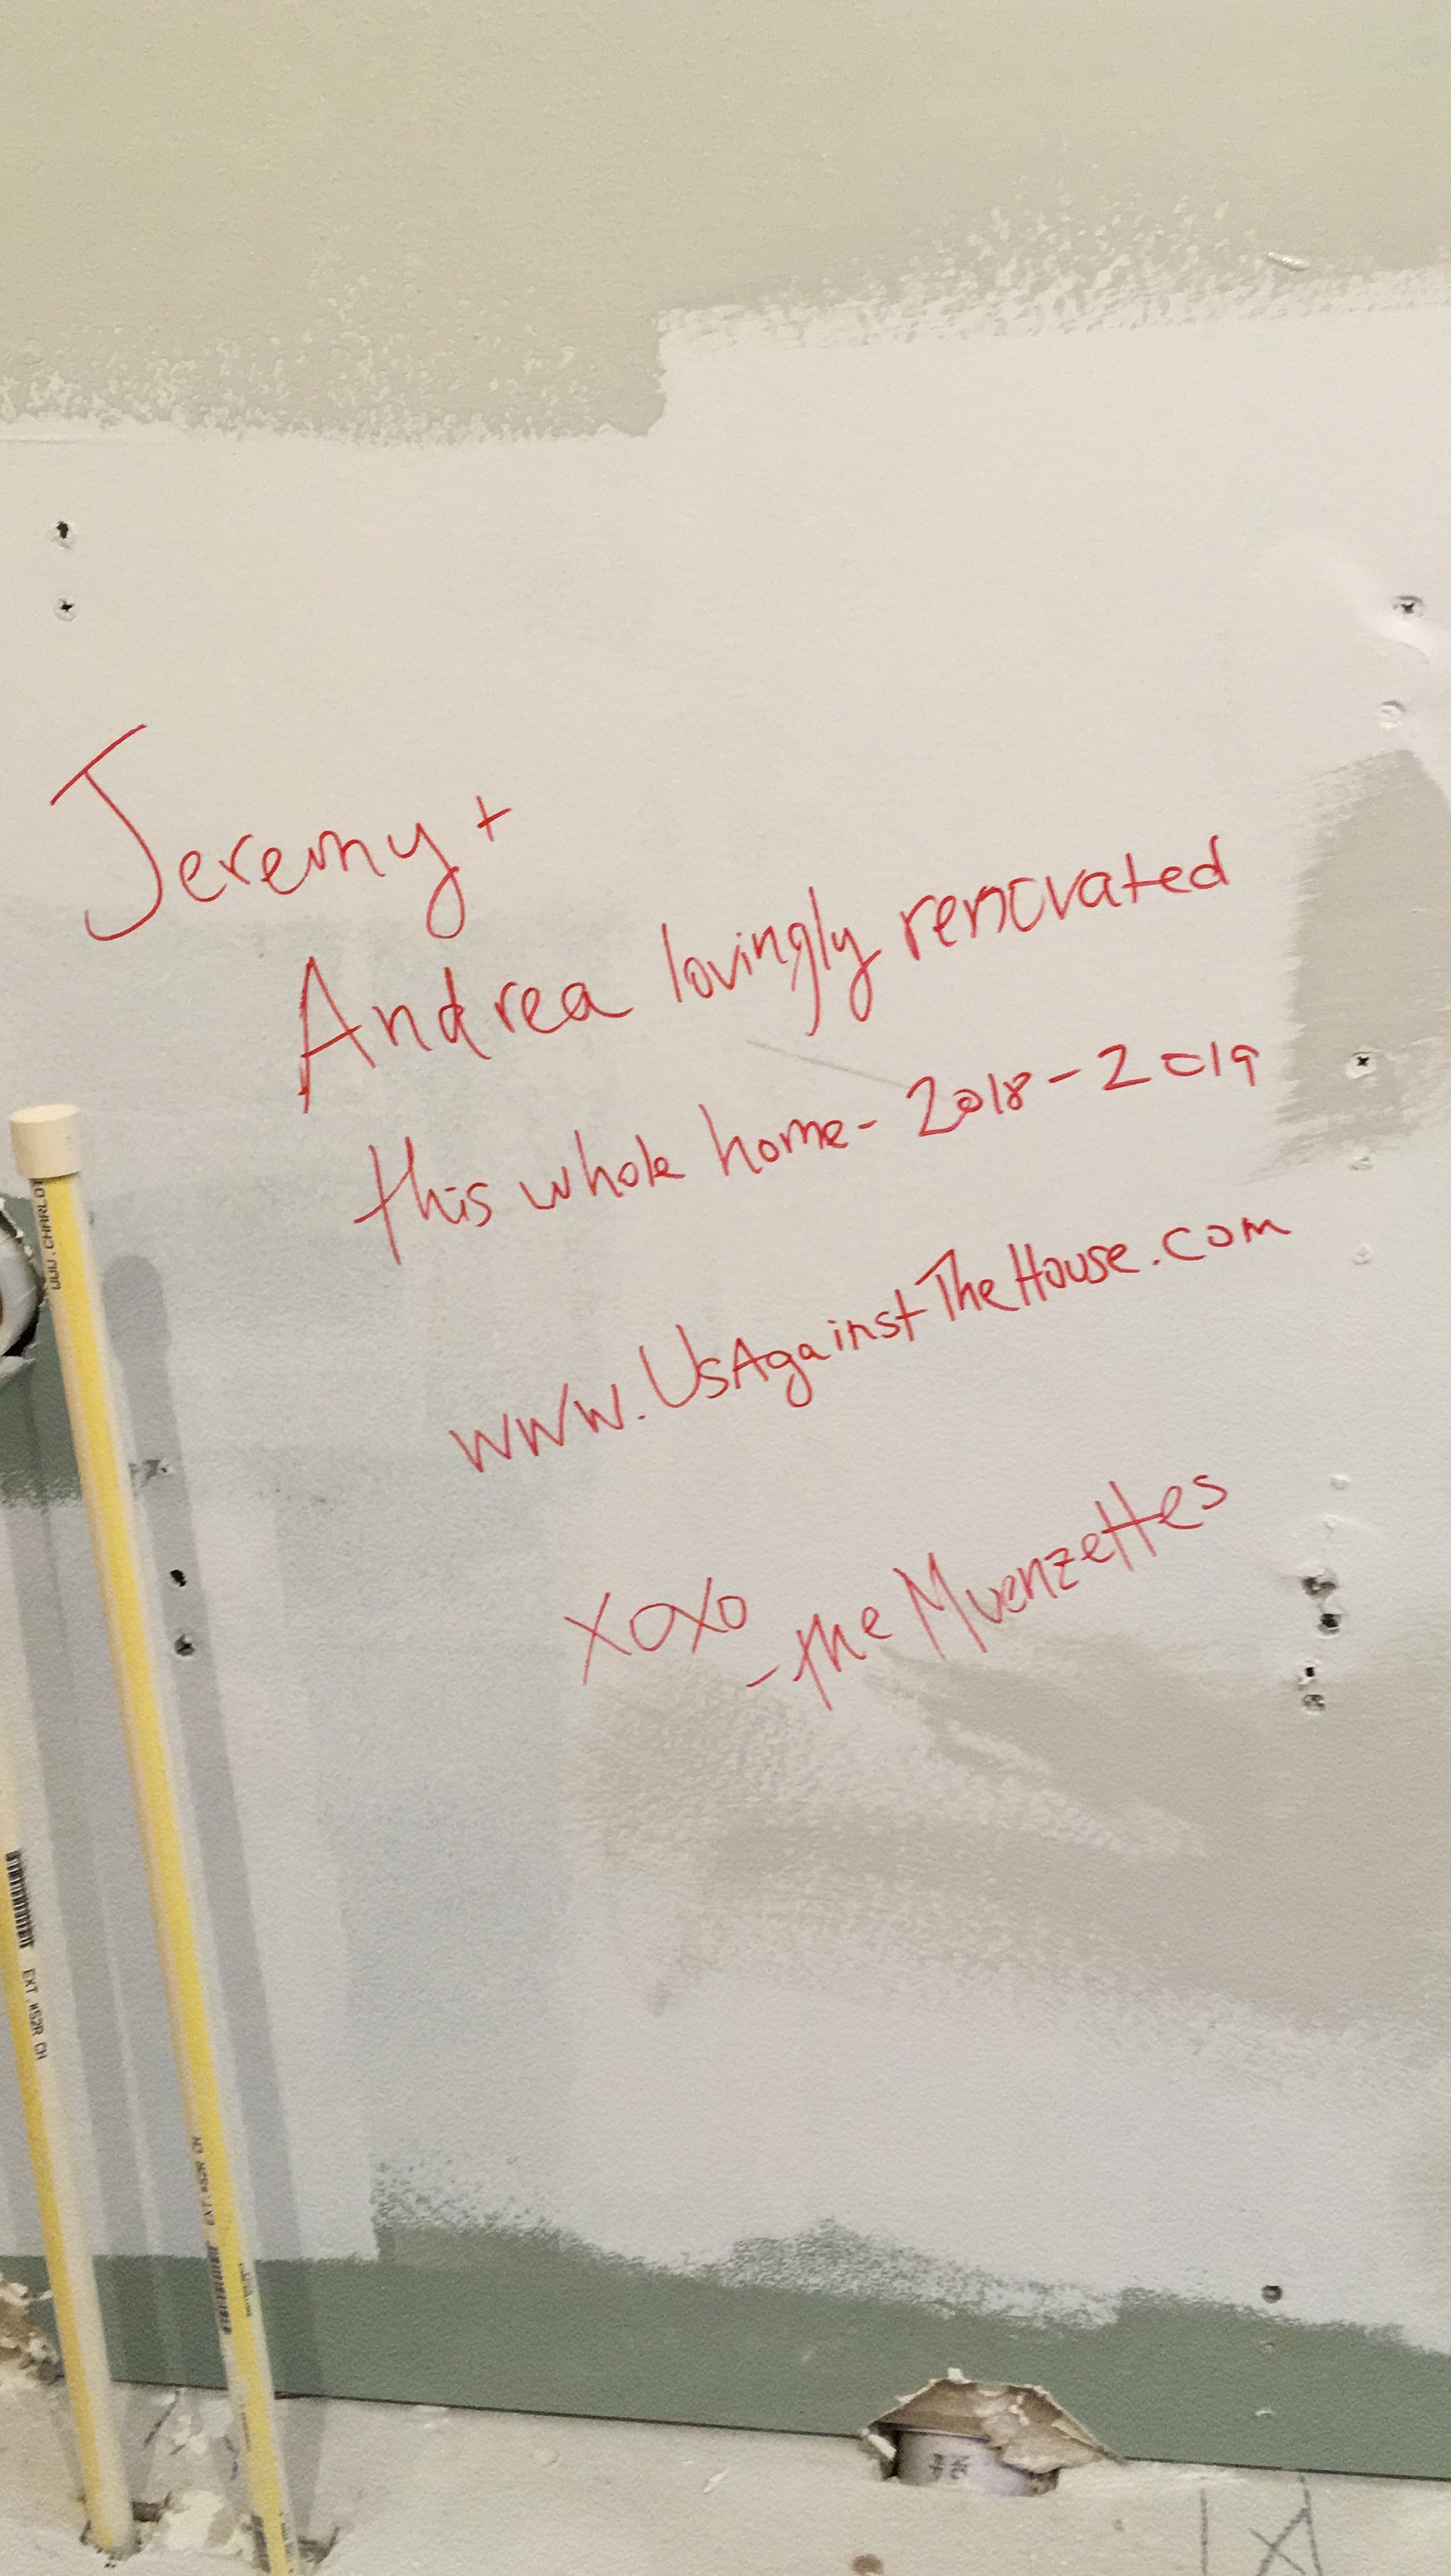
We even found time to tag the wall behind the vanity…for posterity.
The entire weekend was a huge amount of work but now we are ready to tackle the truly intimidating next step of installing the marble floor, walls, and shower floor. We got several quotes around $2,500 for the labor alone, so we figure should try to do it ourselves first.
We passed a sign in our neighborhood for an apprentice school for high-schoolers to learn construction trades and it made me realize these last six months have been one long apprenticeship for both of us. We are constantly learning how to use new tools and are jumping from one trade to the next: demo, electrical, framing, drywalling, painting, etc. etc. etc. And now we are learning the trade we are both most intimidated by: finishing the bathroom. This series of posts will highlight how we are taking the space from this to a master bathroom oasis:
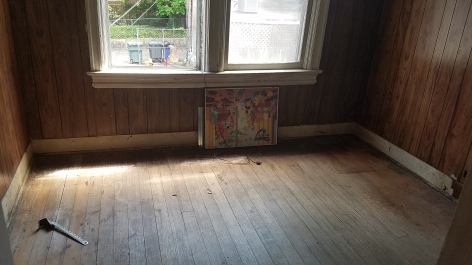
Before: the future master bathroom awaitsWe plan to close the left doorway and put the stand up shower there.
This series will also highlight mistakes we made along the way and how we fixed them.
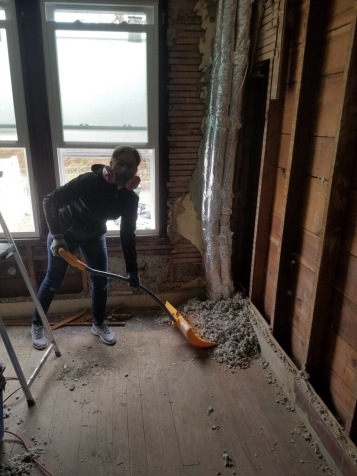
Before we could do ANYTHING to transform this space, we of course had to demo all the walls and ceiling, which meant a ton more plaster dust, lathe, and insulation to get rid of (not to mention that horrible fake wood paneling). Our friends Julian and Chris came over to help demo because who doesn’t love smashing things to bits?
The only photo we have of demo day!Just shoveling some insulation away
Once demo was completed, we were ready to start the project!
***
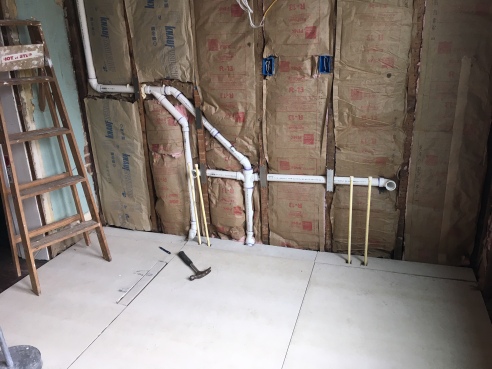
Jeremy and I started tackling the master bathroom this weekend. Our general contractor roughed in the plumbing and electrical for us and poured the concrete base for the shower, and left the rest for us to finish. I don’t have a photo of the demo-ed room before we started, but imagine a 9′ x 10′ room with open walls and ceiling and the original wood floor.
We are now tasked with finishing the room–which means putting up the ceiling, walls, the floor, installing tile, and putting a vanity with a closet in place. The tasks that lie before us honestly scare the crap out of me, but we are going to take it one step at a time and see how it goes.
The first step was installing normal drywall on the ceiling, which we did on Saturday. We used our trusty drywall lift which makes ANY ceiling work so much easier. We are drywall experts so this wasn’t too tough.
The next step was preparing the floor for tile. This room had gorgeous, beautiful 100-year old heart pine as the floor. We seriously considered keeping the wood floor but after much debate and research, we decided real wood floors in a master bathroom were just not a great idea. We didn’t want to risk the floor warping from water damage over time, so we made the sad and difficult choice of covering it with tile (to be fair, I did try to sell the planks but no one wanted them). To ensure the tile floor won’t crack over time, we were sure to do the prep work right and not cut any corners….which meant a TON of grueling, back-breaking labor.
Cement board is NOT FUN to work with–it’s waaaaay heavier than drywall and infinitely harder to cut or screw into. I did a lot of complaining this weekend about how much I hate working with it. Here we ran into mistake number 1: we did not have the correct type of blade to cut the cement boards. Always make sure you have the correct tools before you start! With much difficulty, we cut all the pieces we’d need first and “dry fit” them onto the floor to make sure we covered the entire bathroom floor.
Dryfitting the cement boards
Then we mixed thinset in a bucket, then I spread it across the floor using a notched trowel.
Mixing thinset in a bucketSpreading the thinset across the floor.
We laid down each sheet of cement board and Jeremy screwed it into the floor using a special cement board screw. This is where we encountered another problem–we didn’t have a powerful enough drill so the screw heads would not screw flat into the floor–they popped up ever so slightly. The bumps from each screw will make it difficult to lay down floor tile, so Jeremy ordered a special drill that hammers while it screws (who knew?!) so he will have to go back and push down each damn screw again.
Screwing the cement board to the floor below
I used a special kind of tape on the joints between each board, then spread thinset across the seam–all of these steps are required to ensure the subfloor is correctly installed so the tiles on top won’t crack. We have read that lots of people cut corners during this prep phase but come to regret it later when the tiles crack or pop off the floor.
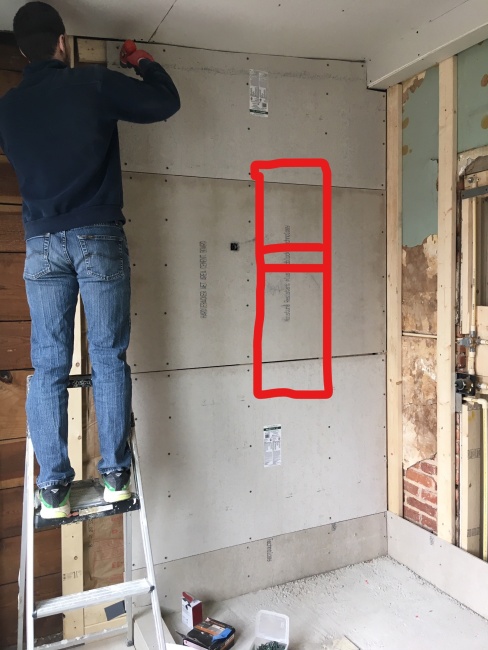
Jeremy also took on the task of screwing the boards onto the wall around the shower. This is where we made our next error. We both completely forgot that we want to install a shower niche to hold shampoo bottles and soap, so we have to remove these three boards and install the niche directly in the middle of this wall. What a waste of time and effort!
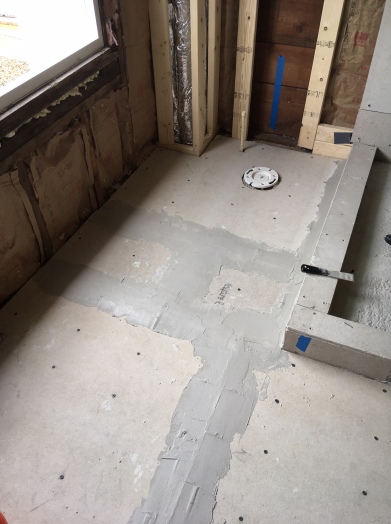
It may not look like a lot was accomplished, but it took two full days to get it to this point, all of which was NO FUN.
The cement board floors after one million hours of workThe face of proud exhaustion
The next steps will be to install the shower niche, waterproof the entire shower stall with RedGuard, and install the rest of the walls around the room. Then we will take a quick lil break to get married and go on a honeymoon, then return ready to finish this damn room!
Today I am very pleased to share our transformed bathroom!
Our new hall bathroom–a marble oasis!The old bathroom–a disgusting and scary place to spend any amount of time
Before we moved into the house, we knew we HAD to remodel the upstairs bathroom. It was old and gross and sad and no one wanted to take a shower in that tub (partially because it was covered in duct tape–which is a bad omen–and partially because it hadn’t been cleaned in several years). We had every intention of doing it all ourselves, but once we realized how long it would take for us to learn and do it all, the decision to hire a handyman seemed like the best option. This was back in October before we lived in the house so time was of the essence! Our handyman was able to do the bulk of the work over two weeks, while we worked on the rest of the house.
When we purchased the house, the bathroom had a tub, a toilet, and a small pedestal sink. We wanted to swap the location of the sink and the toilet to make more room for a larger vanity, while keeping the bathtub where it was. After reflecting on the cost of moving plumbing around, we decided not to change the location of any of the fixtures, which limited how much “design” went into this renovation. We literally ripped out everything and replaced all the fixtures and materials with new fresh updates. Since the house is so old, the bathroom is really tiny and leaves very little space for modern fixtures like elongated toilets or vanities with under-sink storage cabinets.
Bathtub: Eventually we plan to build a master bath in the back of the house, but for now this will be the only bathroom. And one day it will probably be used by dozens of dogs kids so we definitely needed to keep the tub. We were worried that the bathtub was smaller than the standard 30” x 60” size sold in stores. The nasty bathtub measured only 28” X 56.” It was very hard to find smaller bathtubs to fit that space. During demo, we happily discovered that our tub WAS a standard size after all! Over the years, previous owners had installed new tile on top of older tile, essentially squeezing in the three walls around the tub. Our handyman ‘excavated’ the three layers of tile to reveal a standard bathtub size, which made it SO EASY to find a replacement. Not so easy was hauling the old, original tub outside to the dumpster–it was cast iron and easily weighed over 300 pounds. Needless to say I did not participate in that activity.
Our new bathtub!
We went with this tub that I refer to as “pregnant” because it has a curved edge to allow for more soaking room. We also installed a curved shower rod to make the shower feel larger, which is important since the attic stairs cut off some of the standing room.
Shower wall tiles: We installed these 12-inch white marble tiles with white grout. I love them! They make the bathroom feel very luxurious. At $20 per box, we spent $260 on the tiles.
The nasty old tub with tired tiles on the wall
12 x 12 marble wall tile by MSI (from Home Depot)
Sink: Similarly, most vanities with sinks were too wide and too deep to fit the small alcove with a human also occupying the same space. We wanted a 30-inch-wide vanity but then we’d have to cut off the window sill which seemed dumb. But a 24-inch-wide vanity would have left gaps on the side for your toothbrush to fall down, never to be seen again. These are things that most interior designers probably know, but I’m learning as I go. For weeks, I was building my dream board on pinterest and starting to seriously narrow down my options for a new vanity, only to learn the hard way that all of them were too large.
I ended up buying a vanity in both 24 inches and 30 inches, hoping our handyman could somehow ‘make it work.’ Only after both vanities arrived did we realize that no vanity with under-sink storage would EVER fit in that space due to how tiny it actually is. So back to the pedestal sink we went! We ended up installing this beauty to maximize counter space, with this faucet.
Our pedestal sink may not have any storage but at least it looks pretty!
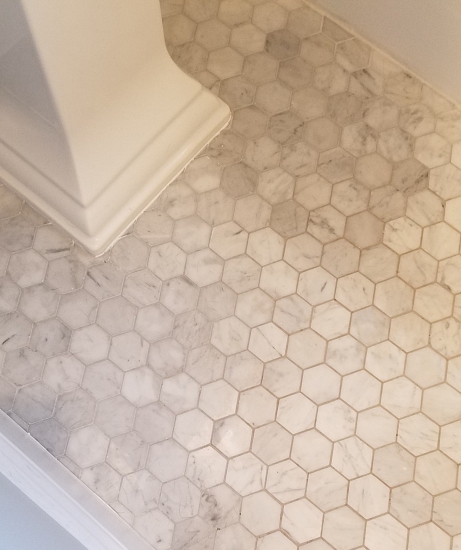
Floor tiles: We installed these 2-inch hexagon white marble tiles with gray grout. They bring me so much joy and I’m thrilled we installed them. (side note: our handyman did a very bad job installing them the first time around, so we asked him to re-do them. Luckily he didn’t make a fuss when we asked him to pull it up and do the whole thing over again–on his dime. In fact, we moved into the house with only half the floor covered in tile, the other half of the room was just a cement floor. Needless to say, contractor timelines are NEVER correct).
Hexagon marble tiles by MSI, purchased at Home Depot
Toilet: Most people don’t have #toiletgoals but apparently I do. I wanted the smallest possible toilet, for under $300. When I discovered how cool-looking and space-saving floating toilets are, I was sure we would get one. But they cost a TON of money to install, so I’ll let that dream lie in wait for now. Due to space limitations, we ended up purchasing this round toilet which is slightly smaller. But at least it’s dual flush which is better for water usage. Since we removed several layers of wall behind the toilet, there is now a slightly larger gap than standard between the tank and the wall. What should I do with this newly reclaimed space? Just kidding.
Our toilet with a big old gap behind itThe old toilet…yuck
Paint Colors: We needed to make a paint color decision super fast after we scheduled the handyman, so I did a quick google search and decided on Sleigh Bells by Benjamin Moore. I’m so glad we picked this color (sight unseen!)–it’s a baby soft light green-blue, and makes the bathroom feel like a cool oasis. It’s hard to photograph so just take my word for it–or come over for a visit! We installed the same 7.5-inch floorboard trim to match the rest of the house, and painted all the trim Super White by Benjamin Moore.
We plan to refinish all the doors in the springtime when the weather is warmer and we can strip the paint and re-stain them outside. For now that means we have to look at the nasty old paint job….sigh, no job is ever done!
Unfortunately the 10-day timeline turned into over two months, due to delays on getting the pedestal sink and asking our handyman to re-do the floor tile. Luckily they finished the work shortly after Christmas while we were on vacation so that only lasted a few days of us living there.
Regrets and lessons learned:
Since we selected the bathroom materials in a rush, there are some things I would change but not many. I would have selected a different lighting fixture that’s less massive and a bit more feminine. It’s too late to return it, so we are going to live with it for now.
The lighting fixture makes me feel NOTHING
We didn’t have time to buy any blinds or window covering before we moved in, but the window faces a VERY busy main road, so we definitely need something to provide privacy. We haven’t figured out what type of curtain or shade to get yet, so for now we taped up a $6 paper “curtain” from the hardware store.
And I’m only now starting to re-think the marble tile choice. Hear me out: they are GORGEOUS but everyone is warning me how difficult real marble is to upkeep over time (seriously, how did we not know this when we COVERED the future children’s bathroom in marble??!). So the real question is: should we install real marble tile or marble-look porcelain tile instead? The porcelain alternative is comically cheaper and much easier to upkeep over time–but it doesn’t give you the same *feeling* that natural stone does, and doesn’t add resale value to the home.
My heart and my head and my wallet all want different things. I mean, how can we have real marble in the kids/guest bathroom and porcelain in the master? What would you do? Does anyone have any POSITIVE experience with marble in their bathrooms? We need to cover the floor, the wall around the shower, and the shower floor in our master–should we do porcelain in some places and marble in others, or would that look insane? Help!