
Today we reveal our master bathroom. It took over 8 months, but we finally made it. And It. Is. Glorious. All of our hard work paid off in a huge way, and I am proud to share the work that went into finishing the bathroom.


As a reminder, we started in December by demo-in the existing space, hiring a general contractor to ‘rough in’ the plumbing and electric, laying down the cement board on the floor and putting greenboard on the walls. After that, we painted the walls and picked real marble for our tiles. Then we got to work tiling the floor in a herringbone pattern, but not before Jeremy installed the heated floor! Then we tackled the most intimidating part of the room, which was tiling the stand up shower.
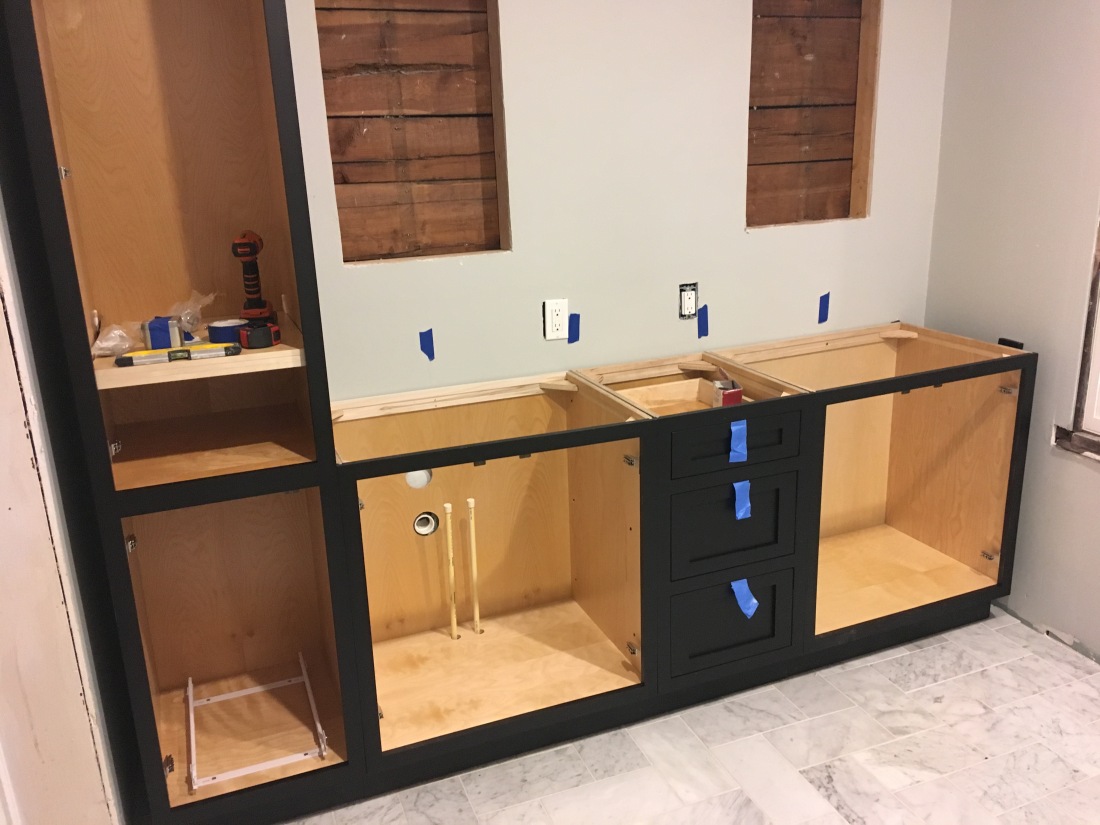
In June, we were finally ready to install the vanity and linen closet! We ordered ours from Ferguson Showrooms instead of buying a pre-fab one because we wanted it to fit the entire room from wall to wall. Basically we ended up placing three separate cabinets next to each other and then installing a countertop over it–just like you’d do in a kitchen. We went back and forth about the linen cabinet because it was not cheap but we wanted it to match the vanity and maximize as much space as possible for storage. We decided to go for it and purchased the linen closet and I REGRET NOTHING. Just look at it! It even has a pull-put laundry basket at the bottom. Form and function never looked better.

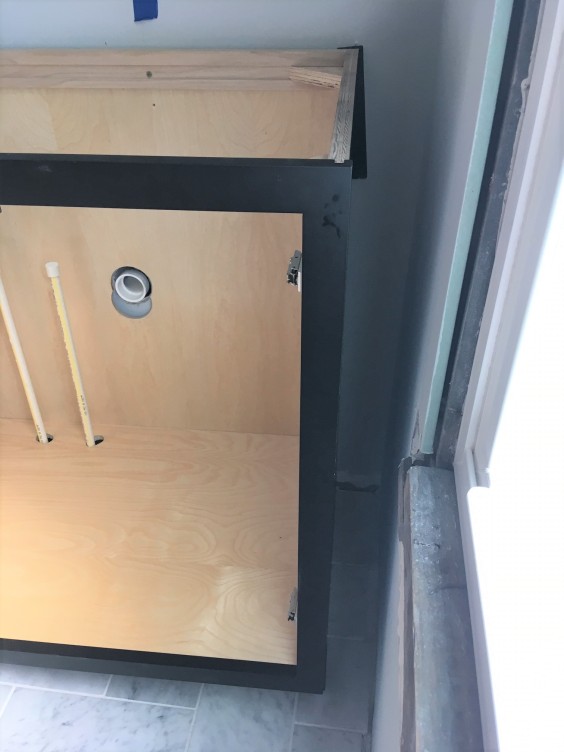
The vanity came in four pieces. We had to drill holes in the two sink cabinets for the hot and cold water lines, plus the drain. It took a lot of measuring, a few mistakes (which luckily will be hidden in the bottom of the back of the cabinet under the sink), and these drill bits to cut perfect holes in wood, but we did it!

To install the vanity, we had to address the challenge of the floor being slightly sloped in one direction. We thought we’d be able to shim them but it was proving too difficult. So our friend Chris came over and helped us to screw all three of the vanity cabinets together to create one long piece, then we lifted it over the hot and cold water pipes into place. Pure genius! Then we shimmed it to make it more level, and secured it in place by screwing the vanity to some studs
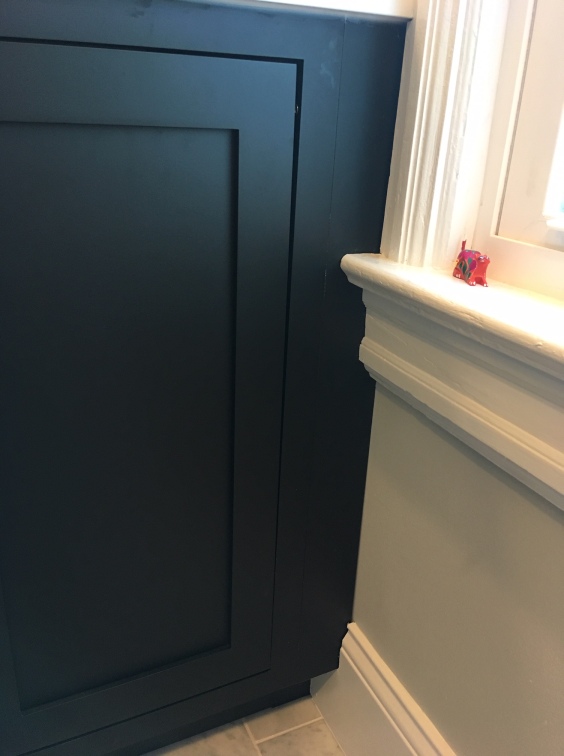
We hired a handyman cut some filler pieces to fill the gaps on the left edge of the linen cabinet and right edge of the vanity — it was just a few inches of blank space. When designing and installing kitchens and bathrooms, filler is your friend! It’s way better to fill an empty inch of space then for your cabinets to be too large to fit!

We went to countertop heaven in Maryland and selected a remnant of an all-white quartz counter. Hot tip: you can buy leftover pieces at great prices from other people’s countertop projects at marble and granite yards. And they are really fun to walk around! They installed the counter the next week, including these undermount sinks.

Ok, back to the shower. Jeremy installed this shower system by Delta. Technically the color is called Champagne Bronze but it’s a brushed brass look. I don’t love this product. Our kitchen faucet is also Champagne Bronze by Delta and they both suffer from showing very obvious water spots. I brush them clean about once a week with my towel but it’s still mildly annoying. Unfortunately there are not many affordable options for ANY fixtures in brushed brass, which is why I stuck with Delta. The pictures below show the fixtures how they normally appear with water spots, and after I cleaned them with a towel.


When we tiled the shower walls, we cut holes for the plumbing so Jeremy could attach the fixtures. Our general contractor had to come back to fix one of the roughed-in pipes but luckily we hadn’t closed up the wall behind the bathroom yet so it was easy enough. Then we tested both shower heads in a moment of truth and luckily the shower heads functioned just fine! I was sort of expecting a pipe to burst and flood our entire house, but thankfully we don’t live in a movie and that didn’t happen.

For the glass shower door, we got five quotes from glass companies that ranged from $1900 to $5000. The range of quotes we get is proof that it ALWAYS pays to get at least three quotes. We didn’t want to blow up our budget so we selected the cheapest option (they had many good reviews so we hoped for the best). And they did an EXCELLENT job! We ordered all the shower hardware in satin brass, to match all the hardware in the room.
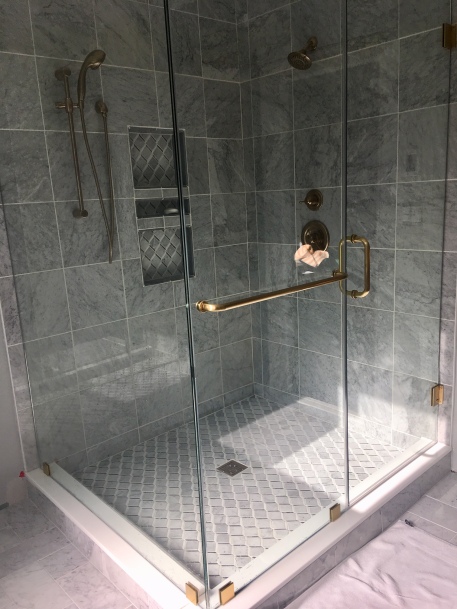
Here’s a close-up shot of our perfect shower niche

In July, I went away for a girls weekend to the beach, and Jeremy got to work! In just two days, he installed the baseboard and window trim, the faucets and plumbing under the sink, four wall sconces, and the toilet. I married right.
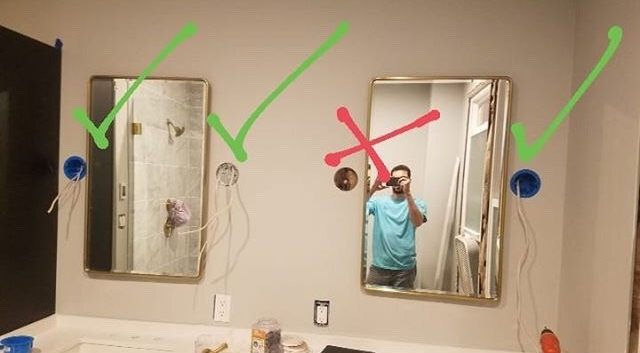
Months earlier, Jeremy had the foresight to plan where the electric wires for the lights should go, so now that he was ready to install the lights, all he had to do was cut a hole and pull the wire through. It worked perfectly for three of them, but the fourth wire was stuck behind a stud (blarg! so close!). He did some adjusting and cut a few holes in the drywall and the stud, but eventually he pulled it through and installed all four lights.

We purchased our wall sconces from Amazon and they are beautiful. I actually bought 4 different styles and brands of light, and this one by far was the best in terms of quality, and at such a great price. I won’t go over the inner struggle on selecting a style, but suffice it to say that picking one light from an infinite pool of possibilities is difficult. I didn’t want everything to be too ‘matchy-matchy’ but I also wanted it to look a designer who knew what she was doing was involved. I think this one is juuuuuust right.

The mirrors are actually medicine cabinets! They are huge, so they fit tons of stuff, and they are pretty! The faucets are also from Amazon, by a lesser known brand called Symmons. Again, finding ANY faucet in brushed/satin brass was proving to be a small fortune, to the point where I was going to give up and get one in black. Until I stumbled upon this brand. They sell several brushed brass faucets at a fraction of the price of the established brands.

The cabinet pulls are a slightly cheaper version of some beautiful and more expensive ones I originally bought. They look almost the same and you can’t tell the difference once they were installed. I bought this template to and followed this guide on how to drill holes for the cabinet hardware and it worked like a dream.

We decided not to install any window treatments, but rather frosted the bottom half of the window for privacy. And we luckily don’t have back-door neighbors! We painted the walls the same color as our hall bath, Sleigh Bells by BM, and it brings some much needed color to an otherwise black, white, and gray room.
Our bathroom is everything I hoped it would be. It was so difficult making all of the design choices. I was nervous that it would look wrong, or things wouldn’t match, or it would look like someone who didn’t know how to design a bathroom obviously did this one. But it looks amazing and I couldn’t be happier. Jeremy did so much work to do all the final tasks and finishing touches. I am so lucky that he knows how to AND enjoys doing both plumbing and electric work!
For reference, this bathroom cost us just over $11,000 in materials, and we easily saved over $20,000 in labor costs by doing it ourselves. Purchasing slowly over the course of eight months definitely helped to soften the blow of such expensive materials. We are hoping that the quality of the materials plus the addition of a new sweet-ass, baller master bathroom will increase the value of our home to make it worth it. But even if it doesn’t, my love for this room and the amount of happiness I feel when I’m in it is worth every penny.

wow! Nice page, feeling very inspired!
LikeLike