Small bedroom gets a BIG facelift

The smallest bedroom is complete! We had waited until all the other rooms upstairs were finished before starting to work on this room for a few reasons. First, it was our storage room for tools, supplies, and furniture while we worked on the master bathroom, master bedroom + closet, and medium-sized bedroom. The plumbing to the new master bathroom shares a wall with this room so we waited until the shower was finished to close the wall up. Also we knew it would be the “easiest” room to finish since it was technically the best room in the house when we bought it 10 months ago! This is what it looked like the day we bought the house:

IMG_1975.JPG
The small bedroom on the day we bought the house. It had smooth walls and a finished ceiling. On the surface it needed the least work.

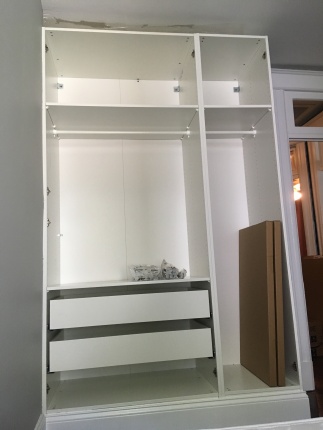
In December of last year, we demolished the original (and tiny!) closet in the corner of the room with the intention of putting in a larger closet. The house suffers from lack of storage space so we decided to do an IKEA hack and create a large ‘built-in’ closet using their PAX closet system. After demo-ing the old closet, we patched up some of the wall that would be exposed. Then….we shut the door and didn’t do anything in this room for half a year.

20190521_113402.jpg
We tore out the original closet and this salmon-colored wallpaper was all the remained

Honestly the door to this room had been closed for so long I had forgotten what it looked like in there. But after we finished tiling the master bathroom and tested the shower (it worked!!), we were ready to close the wall and finish this small bedroom. After we moved all the crap we were storing in there out, I realized how big it felt! Yes there’s only one window but this room has potential to be a nice sized bedroom or home office.

This room originally had a door to the bonus room (now it’s the master bathroom), so we framed it out and covered with drywall. Jeremy is such an expert at drywalling and compounding that he closed up this wall in one day!


He also easily closed up the HVAC duct with studs and drywall. He really is unstoppable.


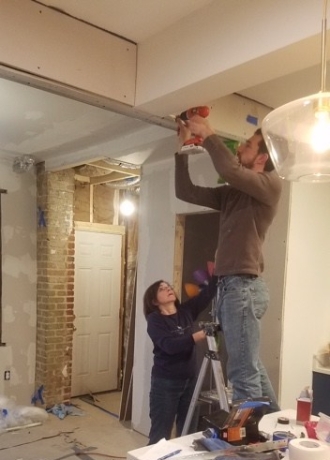
Jeremy also added two more outlets to this room, applying his brick-chiseling skills that he learned downstairs. The room originally had only one outlet so this was a must!

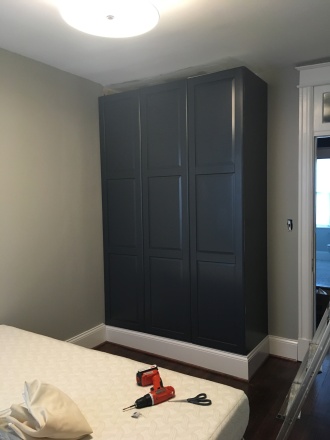
We primed and painted the walls the color Metropolitan by Benjamin Moore (and a huge thank you to Elizabeth for helping me paint the room!!). It is their 2019 color of the year and I am so fatigued of trying to figure out color palates at this point that I figured the best color of the year would work for us! As a contrast, we painted the built in IKEA closet Hale Navy. Jeremy made it look built in by propping it up on a platform and installing baseboard trim around the base. In fact, he cut and installed baseboard trim around the entire room. Again, he is UNSTOPPABLE.

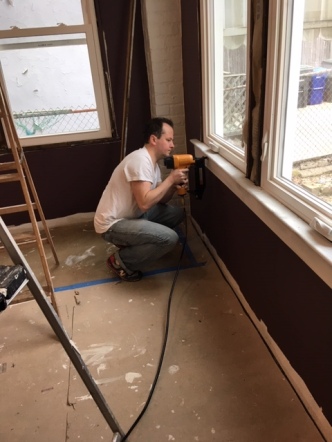
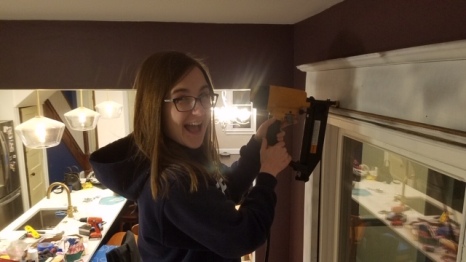
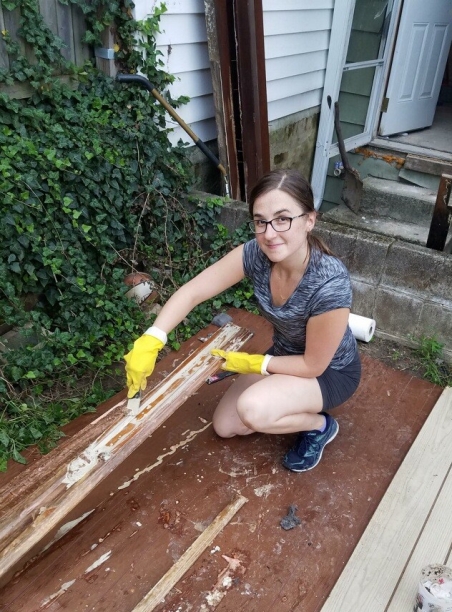
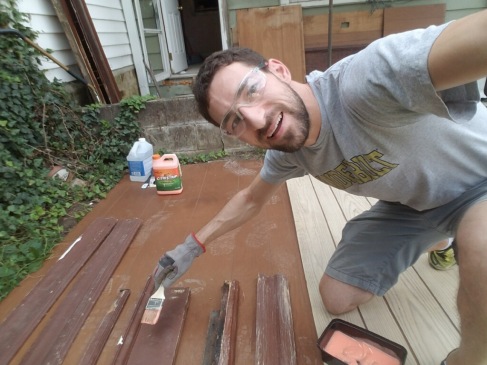
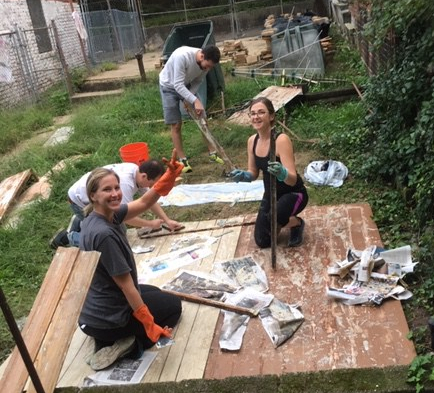
We had removed the window trim last year and put it in the basement for safe keeping.  Now we were finally ready to sand it down, re-install, and paint it. 

Jeremy replaced the sad dangling light bulb with this beautiful, simple light fixture I found on Amazon for $140. I love it so much….and it brings much needed light into the room!  We opted not to install a ceiling fan because the room is pretty narrow and there wasn’t enough space. Will we regret this decision? Only time will tell!

IMG_5300.JPG
Our new light fixture!

One of the most exciting things we did was install the interior closet organizers. Last year, we demolished the closets in all three of the bedrooms in our house, plus there is no closet of any kind on the main floor of the house. Needless to say, I am PUMPED to now have TWO whole functioning closets in our home! The last thing to do in this room is install crown molding on the top of the closet to hide that ugly patched ceiling, so STAY TUNED!

IMG_5301.JPG
Inside the closet, care of Ikea!
IMG_5318.JPG
The outside of the closet, doors painted by yours truly and installed by Jeremy

We got this beautiful bed from a neighbor who was giving it away for free! I couldn’t believe our luck when I saw it posted on our neighborhood freecyle page. It is GORGEOUS and the right size for our mattress. Jeremy’s parents were visiting last weekend so luckily they helped us pick it up and put it together.

IMG_5331.jpg
Loving this gorgeous and free bed from a neighbor!

And just like that, the smallest bedroom is complete! We still need to install curtains and outlet/lightswitch cover plates, but we had our first guests stay overnight last weekend  and they slept like royalty!


Creating a sun-filled oasis–Part 2

I’m back with part 2 of the bonus room renovation. The last post ended as we were priming the walls. I forgot to mention that Jeremy’s parents came over and helped us to close in the side of the beam facing the kitchen. Judy even screwed in some drywall! Way to go, Judy!

20190215_162808.JPG
Judy learned to screw in the drywall
20190215_171512
Judy and jeremy closing in the beam with drywall

Finally we were ready to paint the room! We selected a dark color and I definitely don’t love it. I wanted a dark mauve but its leaning heavily toward purple. I also don’t know how I feel about keeping the brick columns white versus painted.  Either way, we don’t really have the time or desire to re-paint this room, so we will leave it this way for now.

IMG_4078.JPG

Jeremy then sanded down the original window trim and spray painted them with primer. The spray paint version of primer worked well for this task.

IMG_4079.JPG
Our window trim, sanded smooth and primed

Then our friend David came over and helped us install the window trim. We love any opportunity to use our nail gun, and David expertly nailed those trim pieces into place!

IMG_4081.JPG
David expertly nails the window trim back into place

Re-installing original window trim isn’t too hard if you are patient and very careful to put the pieces back in the correct order. After nailing them in place, we filled the nail holes and painted them Super White by Benjamin Moore.

20190303_184544.JPG
Honestly using a nail gun is fun!

Next, Jeremy cut and installed the baseboard trim. Unfortunately we ran out of baseboard trim and are waiting to purchase additional pieces until we need it for other rooms. For now, the space is partially finished and feeling more like a home every day (especially after we removed the floor covering…suddenly it looked like a nice room!)

IMG_4195
Removing the floor covering to reveal a nicely finished room!

So here it is….the almost completed sun-filled bonus room! We still need to finish installing the baseboard trim, switch out the light fixture, and MAYBEEEEE repaint the walls, but for now the room has truly transformed!

IMG_4198.JPG
Our (almost finished) sun-filled bonus room!

Becoming a stripper

The only funny thing about stripping 100-year old paint off of wooden trim is all the jokes about stripping you can make. Jeremy and I have been stripping paint off our window and door trim in the bedrooms for what seems like an eternity. Stripping paint is time consuming and nasty. We are using a less harsh chemical called Citristrip, which does not produce any dangerous fumes and is safe to the touch. The downside is that it take a lot longer to work and doesn’t always do it’s job on the first try.

IMG_2915
Scraping brown paint off the trim

Our goal is to strip off several layers of paint to reveal the original profile of the wood beneath. Our house came with incredible original trim full of unique details that have been covered in gloppy paint over the years. Stripping them will allow us to start fresh.

IMG_2914.JPG
Some selfie action during the stripping

A few weeks ago during demo, Jeremy and I ever so carefully pried the trim off the windows and doors, careful not to snap or crack the pieces. They really don’t make trim like this any more. The wood is real and HEAVY! The trim is comprised of several pieces of wood that were nailed together to create the final look around the windows and doors. I was nervous that we might not be able to put them back after we painted them, there were so many pieces!

IMG_2866
Our collection of wooden trim, removed from all the windows and doors to undergo stripping!

Since then, we have stripped and stripped and stripped some more. I even created a playlist to inspire my best stripping. Some pieces were much easier to remove paint from than others. The difficult pieces are the bane of my existence.  The process to strip the paint goes something like this:

  1. Gather all the pieces that comprise one set of window or door trip to make sure you have all of them
  2. Lay them on the ground outside
  3. Realize they all have huge nails sticking out of them so you can’t start stripping them yet.
  4. Try and fail to pull nails out using tools laying around the house
  5. Purchase an actual nail remover tool–this one allows you to pull them through the wood with incredible ease.
  6. Slather on a thick layer of Citristrip.
  7. Cover in newspaper to prevent from drying (this step is hotly debated in our house)
  8. Wait 2 hours. Do not resist the urge to check if the stripper worked after only 45 minutes. Find something else productive to do during the waiting period.
  9. Use a plastic putty knife to scrape off the now liquefied paint+chemical goo mixture.
  10. Use a 5 in 1 metal tool to scrape the paint off the really hard to reach crevices in the wood, but be careful not to scratch or nick the wood.
  11. Proceed to remove all liquefied paint goo from wood, while covering your entire body, hair, and hands in it.
  12. Dip a steel scrub brush in water and scrub entire piece of wood down
  13. Dip steel wool into mineral spirits and rub across wood to remove any remaining blobs of paint and stop the chemical stripping process.

If after you do all 13 steps there are still spots of old paint on the wood, you must start all over again, to remove the even OLDER layers hiding beneath! It’s been incredibly time consuming to say the least. Hopefully it will be worth it and our trim will be a major showpiece in each room.

IMG_8080
Colleen and David helped us strip several layers of old paint in the back yard

Due to poor timing, we also had to strip paint off trim in the hall bathroom while it was still attached to the wall. We needed to finish it fast because we hired a handyman to help us redo the bathroom and needed to strip the wood ASAP before they started installing new tile and walls.


But the fun doesn’t stop at stripping paint! No no…as if we haven’t suffered enough, we decided to refinish the wood trim around the 5 doors on our second story landing.


The door trim were stained and poorly sealed with a varnish that dried in a bumpy, clumpy, discolored crocodile skin pattern. I attempted to sand the stain and poly off, but after a mere 10 minutes using a hand sander, it became clear that it would take several years to get through all of it. So we turned back to the chemical stripper. After several rounds of stripping stain and the sealant off the trim, it is finally ready to refinish! After photos will be posted in the next few weeks!


We are doing all of this because we really want to preserve some of the historical integrity of the house. 100-year old homes in DC have so much character, and all of this work to restore and reuse some original pieces will hopefully make our house stand out!

Refreshed from vacation and hyper-productive

It’s been one week since we returned from our fabulous vacation and SO much has happened in the house.

For the first time in a long time, I feel calm and in control of the next few weeks. We know exactly what we need to accomplish between now and December first. The list is long and highly aspirational but at least it lays out our plan.

Meanwhile, last week the DC government came to the house and inspected all the work we’ve done so far and gave us the green light to keep going with our MASTER PLAN! Next week a company is going to remove the load bearing wall that goes the length of our main level. We were told we could save $3-4K if we did all the demo work ourselves—by demo I mean removing all the plaster/lath/drywall on top of the studs in the wall. So dammit, remove it we did! Of course we had tons of incredible and much-needed help from friends (thanks to Julian and Matt for channeling your brute strength to smash through all the walls) and stripped all the walls bare in just two days! Unfortunately, demo produces a LOT of garbage. In just two days, we filled 3 Bagster dumpsters (with a combined capacity of 9,000 pounds)!


Our house came with a fake fireplace. We knew it was fake and assumed it was just a thin brick façade. Turns out it was actually a full-sized fireplace made out of genuine (heavy) brick—except it was not connected to the adjacent chimney and therefore completely inoperable. Jeremy destroyed it with a small jack hammer while Matt and I helped him carry them out of the house. Cute enough, a previous owner had installed a fake log with a built-in light bulb (for warmth?). All of this work has helped to expose several square feet of living space that had previously been occupied by a useless pile of bricks.

On Sunday, our friend Lauren came over and helped us think out plans for our kitchen remodel. Always invite your architect friends over on the days you are finalizing plans for a kitchen remodel. She also helped us yank all the nails out of the window and door trim that we want to re-use. After marking on the floor where we envision the new island, we took a field trip the greatest place in the world.

IKEA!

We are designing our kitchen using the frames of Ikea’s kitchen cabinets but covering them with the beautiful doors from SemiHandmadeDoors. Their doors are heavier, thicker, and more customizable than the options at Ikea, but still in the mid-level price range. And lucky for us, Ikea is having their annual kitchen sale in two weeks!

Ikea
Our rough plan for the new open kitchen

I love Ikea. It’s like a playground for adults—with meatballs!!