
It’s been almost two years since we finished our full home renovation! An upcoming feature of our kitchen renovation on the website Kitchn.com really forced us to look back and think about all the work we did…and it’s still mind boggling that we actually did ALL of it. We really were naïve when we decided to buy a hoarder’s house and renovate it ourselves but maybe that’s the best way to take such a huge gamble. We were lucky to actually enjoy the DIY renovation life and we learned so much along the way. Here’s a summary of what we did and what we learned. Honestly, we did so much work this is really only the tip of the iceberg:
Buying a ‘fixer upper’ aka a hoarder’s house:
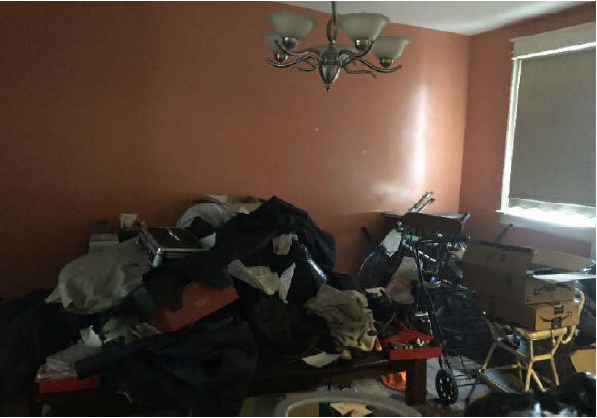
In June of 2018 we toured the house and it was a wreck. Somehow we were able to see past all the damage (including a cracked roof beam and water damage on many ceilings) and junk (hello bathtub full of unused condoms) so we put an offer in on the house. In August We closed on the house and immediately had 8 trucks of junk hauled away. Then we got to work cleaning the whole house of the top layer of grime and had the roof replaced. We spent several weeks cleaning and planning the next few steps of the renovation, which was exhausting. Our first time demolishing a wall was a doozy because it was 100-year old plaster (which was necessary in order to build a walk-in master closet. We also removed the horrible fake wood paneling from a bunch of rooms.


Starting at the beginning….lots of cleaning, learning to use tools for the first time, and planning the layout
September 2018: We moved out of our apartment and into our dear friend’s extra bedroom (‘for a month’ so we thought…which turned into 4 months). We got to work framing out our master closet which was the first time I ever used a power tool… it seems so cute now in retrospect because I was so scared to touch them and now I can use saws and drills and nail guns in my sleep!


We carefully removed the original window and door trim (to restore and re-install later) in order to maintain the original character of the 100-year old house. We started installing drywall in the bedrooms and discovered the extremely helpful drywall lift for ceiling installations. Our HVAC system was installed throughout the house so Jeremy closed in the duct work, added a bunch of overhead lights in the bedrooms, and then we finished drywalling the walls and ceilings. Jeremy spent many hours at DCRA trying to get the permit for the structural changes to our first floor.

October 2018: DCRA approved our structural plans so we demo-ed the plaster and lathe over the walls on the main floor of the home. Demo produces a LOT of garbage. In just two days, we filled 3 Bagster dumpsters with about 9,000 pounds of debris. Then a contractor came in and replaced the load bearing walls with three beams and a column. Jeremy demo-ed and removed the fake fireplace brick by brick. We started to plan our kitchen renovation using IKEA’s kitchen planner software

Complete Kitchen Makeover: Much of our kitchen renovation is covered in the Kitchn.com series but I also summarized it here. It took about 4 months and a little under $30,000 to turn our kitchen from a small galley kitchen with a passthrough window a gorgeous open concept with dark blue cabinets, a huge white quartz waterfall island, and so many details that we love.

This was all made possible by removing 2 structural walls and replacing them with three beams and one column. Jeremy and I decided not to do several aspects ourselves due to cost/time/expertise so we called in a company to remove the load bearing wall, an electrician to re-wire some lights and outlets, and a plumber to move the gas and water line for our new appliance locations. Then we got to work! We covered the beam and column with new drywall, which we had become so efficient at that we joked we could do it in our sleep. We ordered our kitchen cabinets from IKEA (and learned from some important mistakes when designing a kitchen that we will not make again!). Our cabinet doors are from Semihandmade, and I decided to paint them myself. I was not prepared for how much work painting those doors would be (and I wrote about it here). We also finished the back sunroom to incorporate it into our new open kitchen & dining room (documented here and here).


Primary Bathroom: We took an empty room in the back of our house and turned it into the most glorious primary bathroom imaginable—full of marble floors, white quartz counters, matte black cabinets, and bushed brass accents.After demo-ing the fake wood wall paneling and crumbling plaster walls, we called in a professional to ‘rough-in’ plumbing for our new bathroom. Once they were done, it was our turn to finish the space by closing up the walls, installing heated flooring coils, tiling the entire floor and shower, installing a double vanity and linen closet, and installing all the plumbing fixtures.


Basement


We tackled the unfinished basement last. When we bought the house, it looked like the scene from a murder mystery….it had a few dangling light bulbs, no outlets, and none of the walls or floors were finished. We applied all of the skills we had learned over the last year and finished the basement ourselves! Like any renovation, the bulk of the time is spent preparing things that are ‘below the surface,’ AKA the plumbing, the electric, and the insulation. Jeremy removed the old broken boiler and cast-iron pipe system. He moved ALL of the dangling plumbing and electric wires that were hanging below the ceiling joists so we could regain those precious few inches of ceiling height. Then we demolished some interior walls and closets, moved the hot water heater to it’s new home under the staircase, re-built the bathroom walls (expanded to allow for more room). We laid down luxury vinyl tile flooring, refinished the original cast iron bathtub, insulated all the walls and ceiling, and then tackled the gigantic task of drywalling the entire basement (about 800 sq ft of space). Jeremy installed a new toilet, sink, and the original tub, along with some electric baseboard heat so the pipes don’t freeze in the winter.


Taking care of the little details
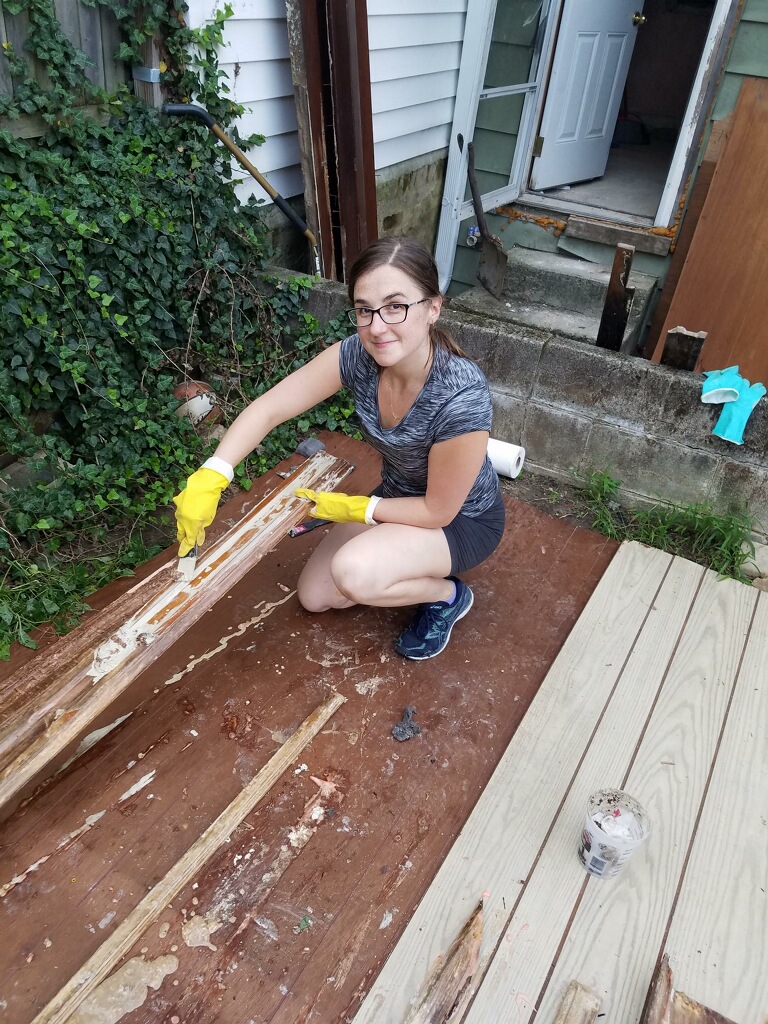
Our house came with incredible original trim full of unique details that have been covered in gloppy paint over the years. Before we demo-ed anything, we carefully pried the original trim off the windows and doors and spent hours filling holes, sanding, and stripping off the of layers of paint and stain. We are decided to do all of this because we really wanted to preserve some of the historical integrity of the house. 100-year old homes in DC have so much character, and all of this work to restore and reuse some original pieces will hopefully make our house stand out! Jeremy spent hours restoring the original trim, and I spent many days of my life carefully stripping old layers of paint, sanding, and refinishing the original doors. We refinished the original stairway and banister and I’m so glad we kept them instead of ripping out and replacing with more modern options.


What a labor of love!
LikeLiked by 1 person